Coloring skin can be a tough task. It often looks flat and lacks the subtle complexity in tones that give it a realistic look.
Luckily, Photoshop offers a very handy tool to aid us. The tool is called Gradient Maps, and with the right technique they can be used to easily color any skin tone in a matter of minutes.
This method will be a HUGE help and time-saver for anyone struggling with skin tones.
Tutorial Summary:
Hint: For the full tutorial, in which we cover many more points, watch the video at the end of the post.
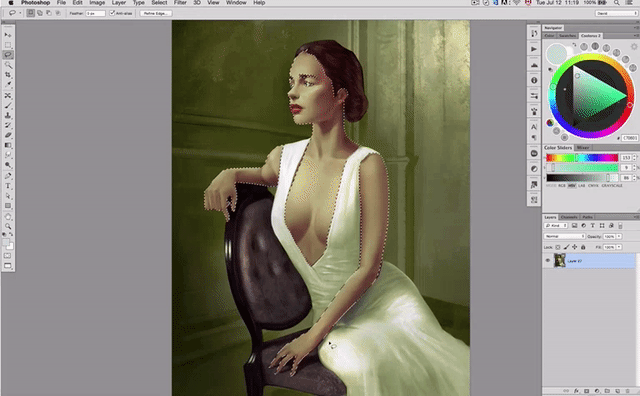
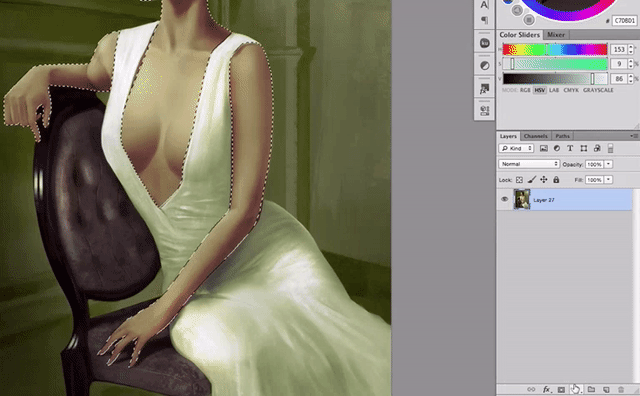
1. Select the area of the skin
Use your tool of choice to make a selection of the skin you would like to color. Photoshop offers us a number of tools to use, such as the Magic Wand, Quick Selection or Lasso Tool.
I personally prefer to use the Pen Tool, as it offers me the most control over the selection, and gives me nice clean lines.
2. Create a new 'Gradient Map' Adjustment Layer
Making sure your selection is still active, click the ‘Adjustment Layer’ button in the ‘Layers’ Panel (the half black, half white semi-circle button at the bottom), and select ‘Gradient Map’.
Alternatively, you could go to Layer > New Adjustment Layer > Gradient Map in the toolbar at the top of the window.
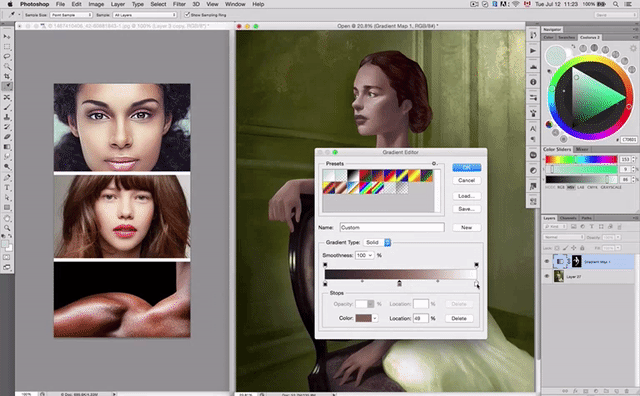
3. Double-click the gradient in the Gradient Map 'Properties' panel
This will pop open a new window, the ‘Gradient Editor’.
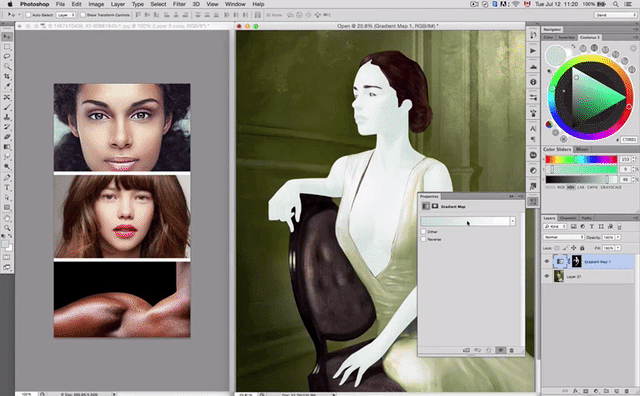
You will also see that I have opened a number of reference images to the left of my painting.
Tip: I highly recommend finding reference photos to help guide you when painting and picking colors. Being able to study the subtleties of skin from a real photo will make a huge difference to your work.
Whether you choose to sample colors directly from the photos is up to you. It will make your job much easier, but if you wish to gain a deeper understanding of picking colors, I challenge you to pick your colors manually.
4. Fill in the base highlights and shadows
Select the markers at the bottom of the gradient, and pick a range of colors to use. On the left side, pick the very darkest skin tone (shadow), and on the right pick the lightest (highlight).
Create a new marker in the middle of the gradient by clicking on it, then select a ‘middle’, or ‘mid-tone’ value.
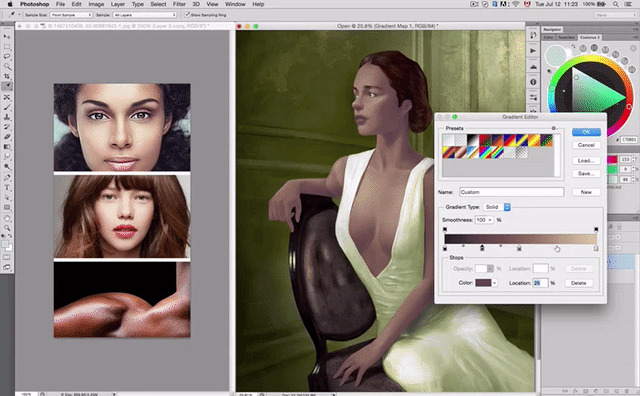
5. Add complexity to your skin-tone gradient
Now if you wanted to be lazy, you could stop at step four.
But you’re not lazy. You want to achieve a perfect skin tone. Right?
RIGHT?
Good. Continue adding markers in your gradient and picking colors that fit in between the shadows and highlights. Skin consists of many subtle differences in color, and adding these extra markers will make your skin-tone much more realistic.
Theoretically, you could continue to add as many markers as you wish. In practice, however, anything more than five will make only very minor differences.
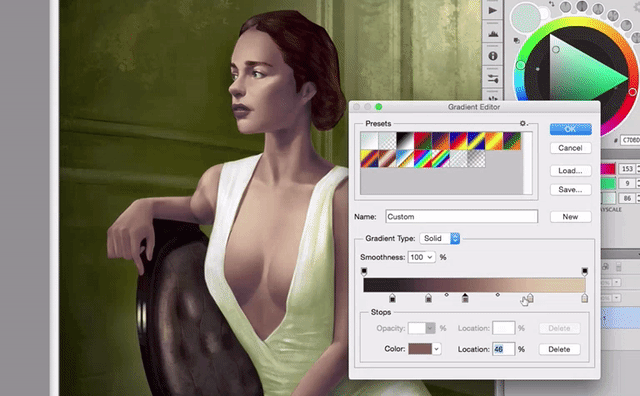
6. Fine-tune your Gradient Markers
This step takes a little bit of practice and playing around. There is no one solution to this. Slowly move your markers to the left and right until you’re happy with the final result.
7. Adjust your colors to the character's surroundings
As with all objects, skin reflects the light around it. This means that a character’s environment and surroundings will have an impact on the color of the skin tone.
In this case, our character is in a green room. We therefore have to add a touch of green to her skin, or she will appear out of place.
To do this, I selected the ‘midtone’ marker, and manually added a bit of Cyan (C) and Yellow (Y) in the Color Picker, as I know that combined these two colors produce green.
It’s as easy as that! To get an in-depth understanding of the technique, be sure to watch the video below.
8 thoughts on “How to Color ANY Skin Tone in 5 Minutes with Gradient Maps”
First of all, I would like to say thank you for making this post. This is a method that will surely be very useful for many people. However, was a bit confused at the post because it seems like the skin has to be pre-painted in grayscale, a step which is not mentioned in the post. But that’s the only gripe I have with this post.
Hi Azul, this tutorial is specifically about skin tones. We’ll be making another post on painting skin as a whole soon though, hopefully that will help 🙂 In the meanwhile, feel free to check out our free course One Week Portrait in which we talk about painting in grayscale.
Hey Brandon, glad you found it useful! I used a combination of multiply and color dodge layers to liven up the colors and add a new light source. I’ll be releasing a tutorial on coloring in the coming weeks in which I’ll go in detail so look out for that!
I would also like to thank you for your time to take out and go through this technique. I find it helpful for me because I have been timid in using color when I do digital paintings.


8 thoughts on “How to Color ANY Skin Tone in 5 Minutes with Gradient Maps”
First of all, I would like to say thank you for making this post. This is a method that will surely be very useful for many people. However, was a bit confused at the post because it seems like the skin has to be pre-painted in grayscale, a step which is not mentioned in the post. But that’s the only gripe I have with this post.
Hi Azul, this tutorial is specifically about skin tones. We’ll be making another post on painting skin as a whole soon though, hopefully that will help 🙂 In the meanwhile, feel free to check out our free course One Week Portrait in which we talk about painting in grayscale.
BOOM – perfectly put in a nutshell! Awesome tutorial as always!
Thanks for your support Beate, glad you like the tutorial!
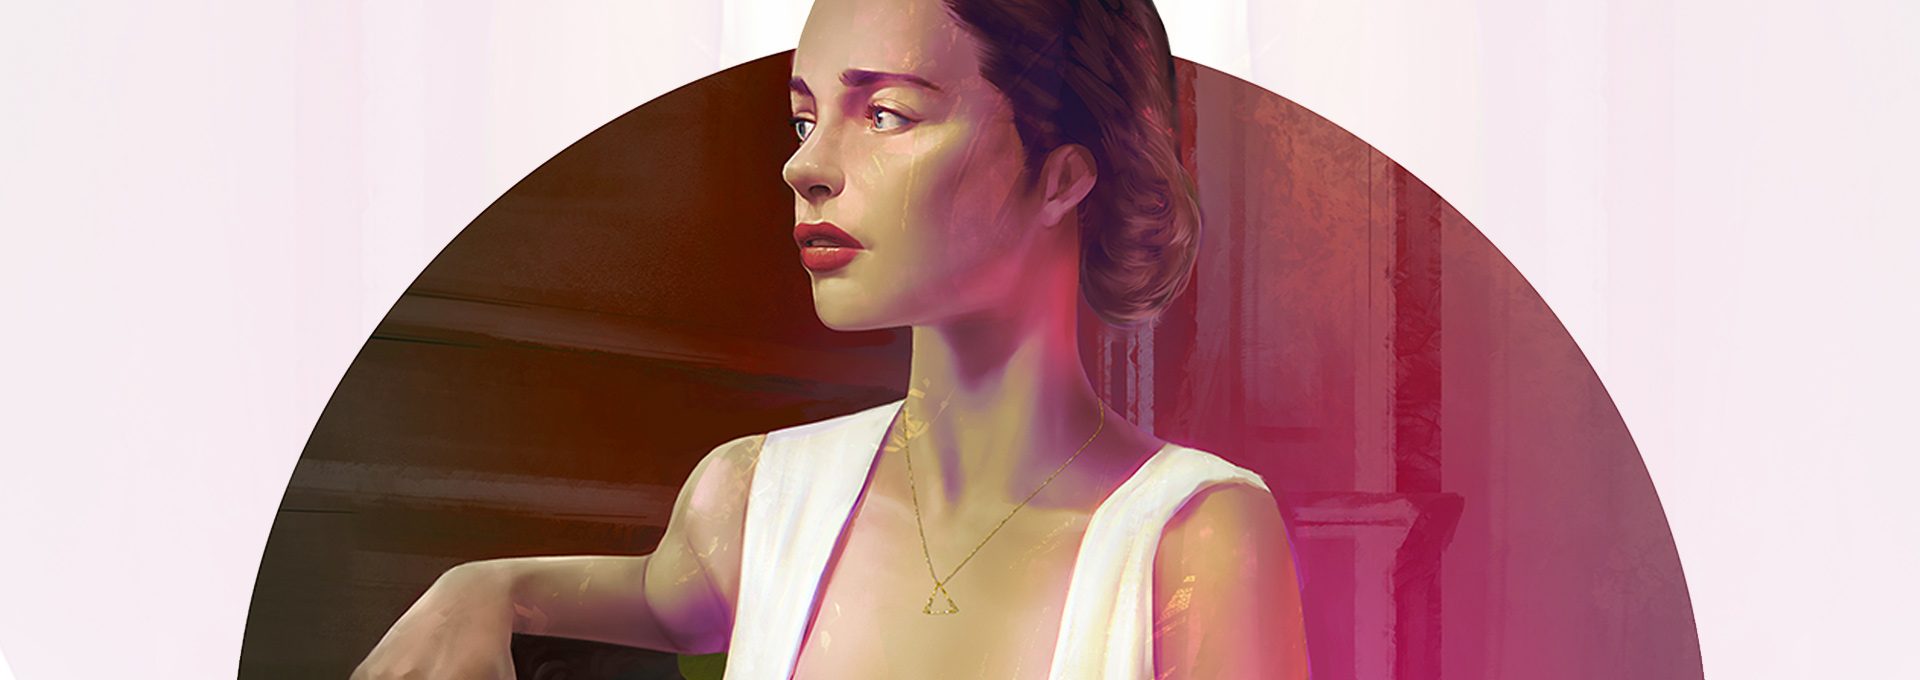
Great share! Thanks for creating this video. Can you please share how you created the more colorful header image to this post? Thanks
Hey Brandon, glad you found it useful! I used a combination of multiply and color dodge layers to liven up the colors and add a new light source. I’ll be releasing a tutorial on coloring in the coming weeks in which I’ll go in detail so look out for that!
I would also like to thank you for your time to take out and go through this technique. I find it helpful for me because I have been timid in using color when I do digital paintings.
What a well written, thoroughly explained video. I created my first gradient map after watching this vid.
Not only does David explain concisely, he also entertains.
I am highly impressed.
Thank you, David